Invoice Approvals
This guide covers the invoice approval workflow for EZ Cloud Essentials.
If your organization uses EZ Cloud Enterprise with ERP integration, see Invoice Approvals (Enterprise).
Accessing Invoices
Click Invoices in the main navigation to access your invoice queue.

Tabs
| Tab | Description |
|---|---|
| Invoices | Active invoices awaiting review or approval |
| Exceptions | Invoices assigned to exception handlers |
| Rejected | Invoices that have been rejected |
Invoice Status
| Status | Description |
|---|---|
| Initializing | Invoice is being processed (data extraction in progress) |
| Pending | Ready for review and approval |
| Approved | Has been approved |
| Rejected | Has been rejected |
The status summary at the top shows the distribution across statuses (e.g., Pending 93%, Approved 3%).
Filtering
Use the filter options to narrow down your list by:
- Invoice number
- Supplier name
- Date range
- Status
- Amount
Invoice Detail View
Click any invoice to open the detail view.
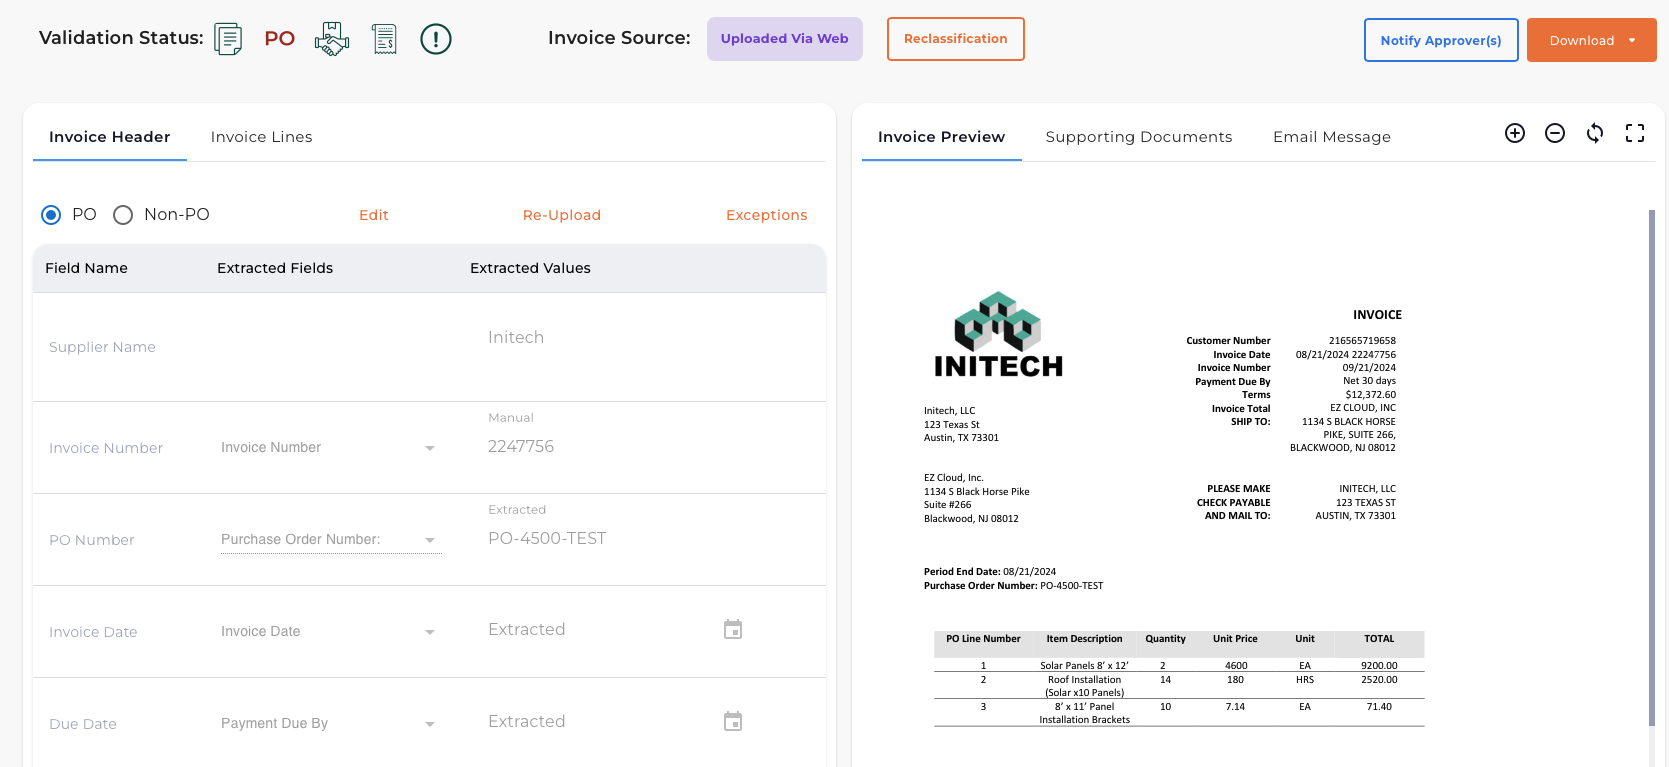
Validation Status
The validation panel shows automated check results:
| Validation | Description |
|---|---|
| Duplicate | Checks if this invoice already exists |
| PO | Purchase order validation |
| Supplier Data | Validates supplier information |
Status icons:
- Green check - Passed
- Yellow warning - Requires attention
- Red X - Failed
Invoice Source
Shows how the invoice was captured (Email, Portal, Upload, or Scanner).
Invoice Header
The Invoice Header tab displays extracted invoice data.
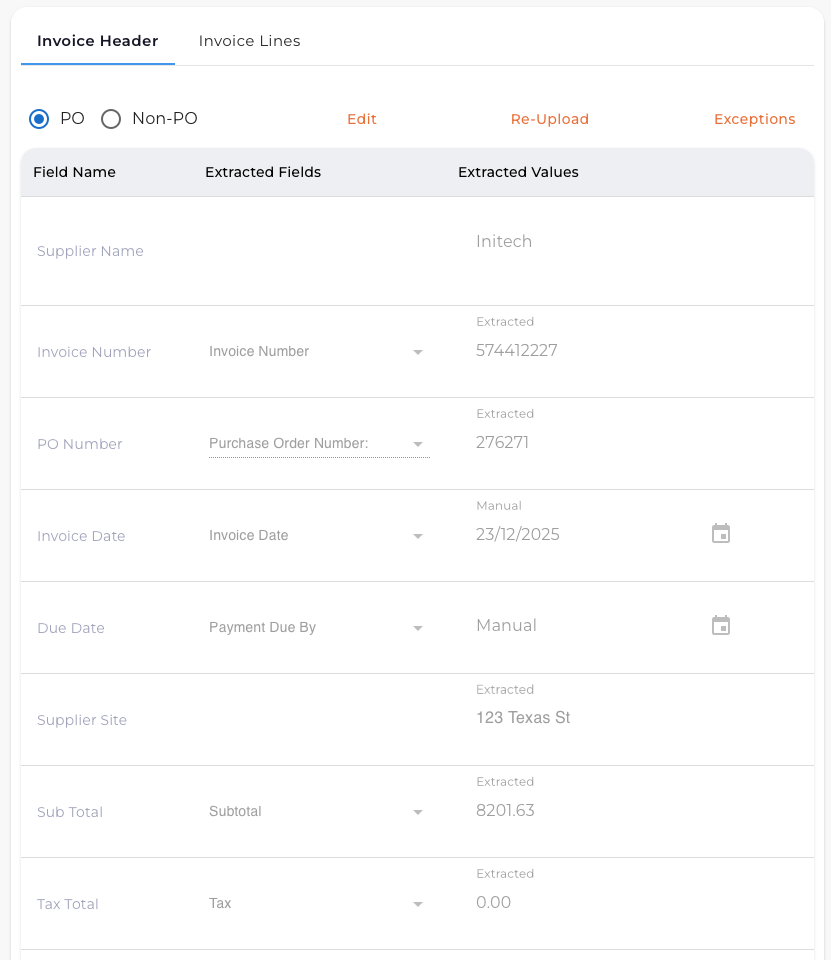
Field Labels
| Label | Meaning |
|---|---|
| Extracted | Automatically extracted by AI |
| Manual | Manually entered or corrected |
Editing Fields
- Click the field you want to modify
- Enter the correct value
- The label changes from "Extracted" to "Manual"
Using Key-Value Pairs (KVP)
EZ Cloud extracts key-value pairs from invoice documents. Use these to populate fields:
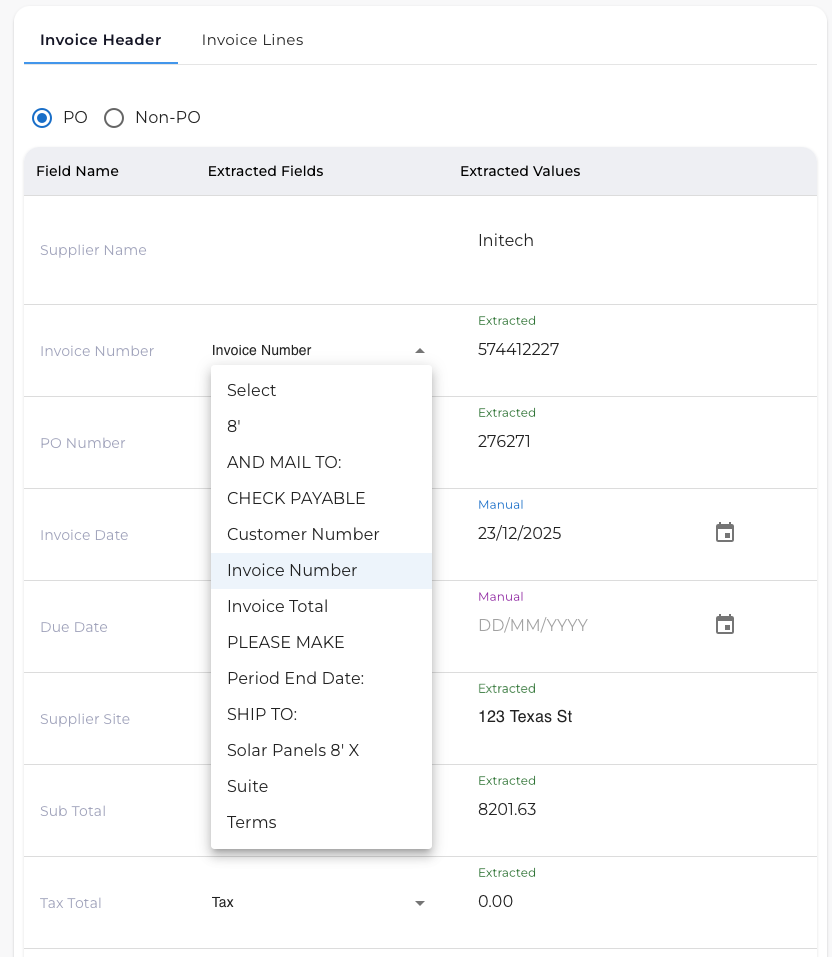
- Click the dropdown arrow next to a field
- Select from available extracted values
- The field populates with the selected value
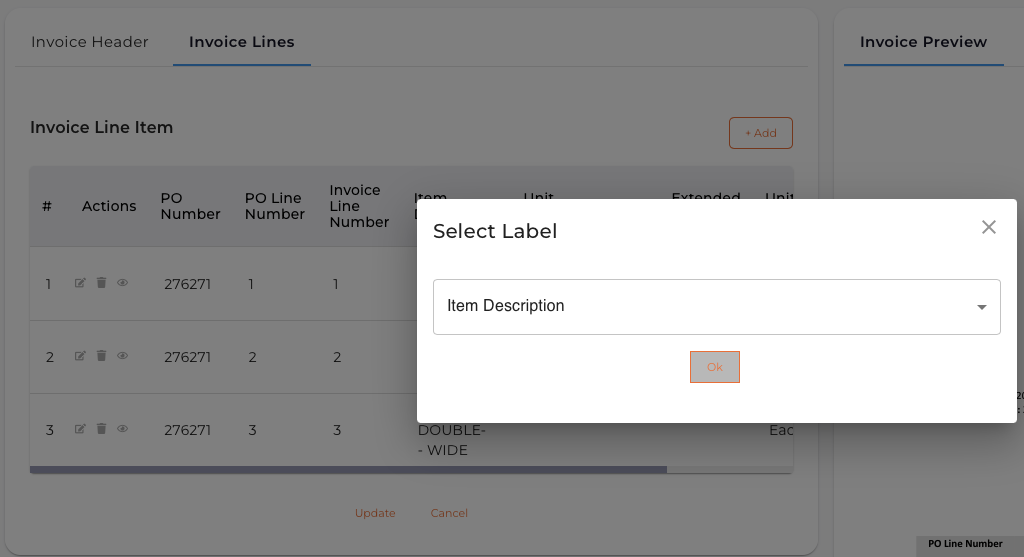
Invoice Lines
The Invoice Lines tab displays line item details.
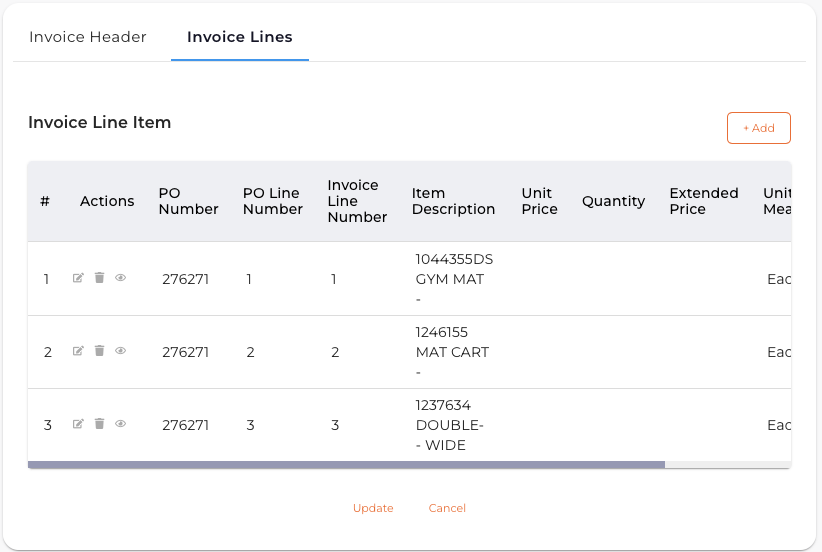
Columns:
- Line number
- Description
- Quantity
- Unit Price
- Amount
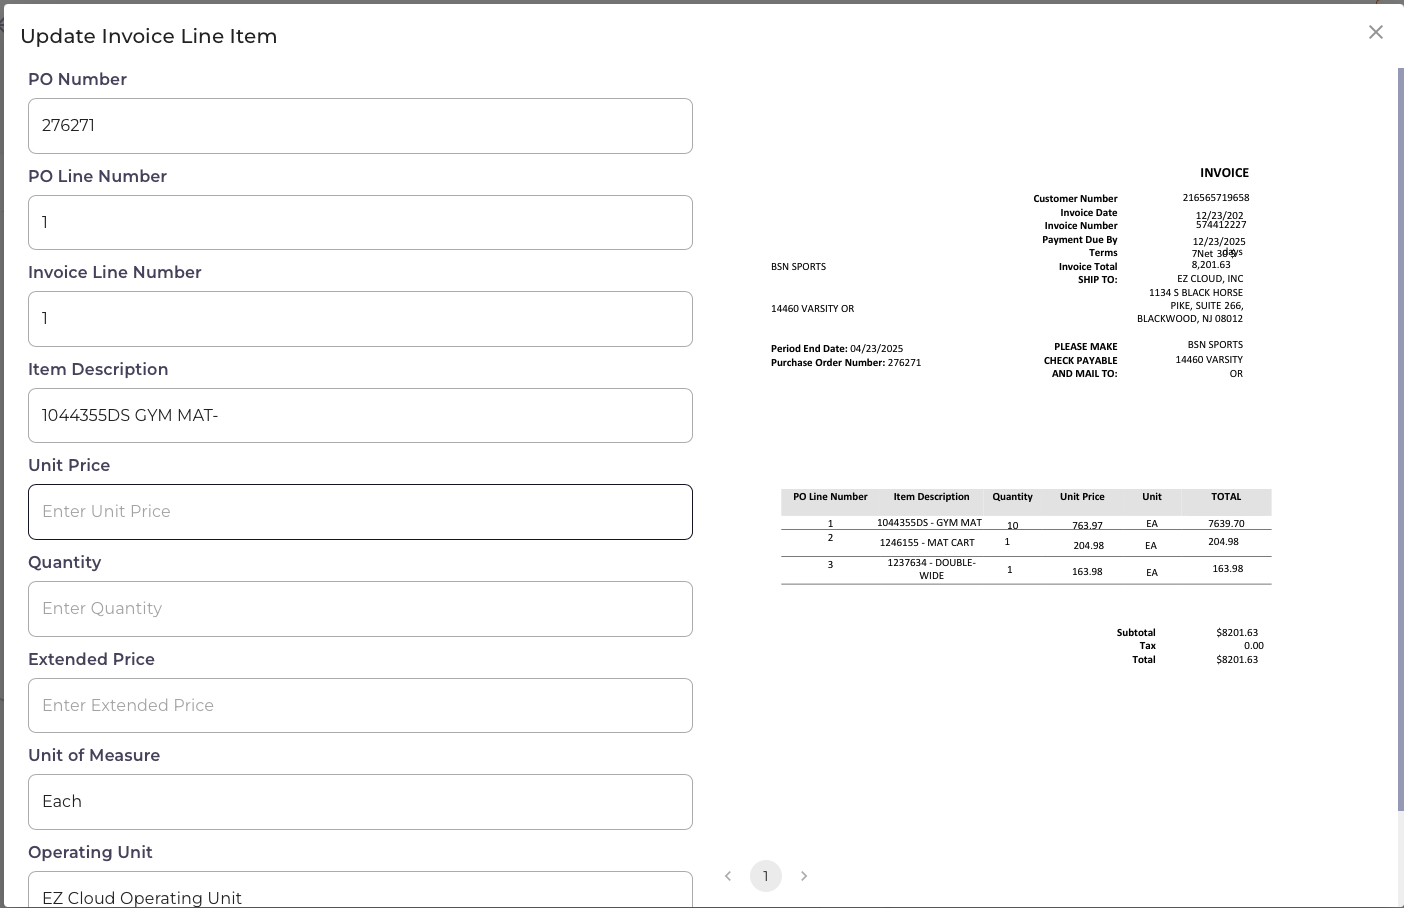
Editing Lines
Click any row to open the edit modal.
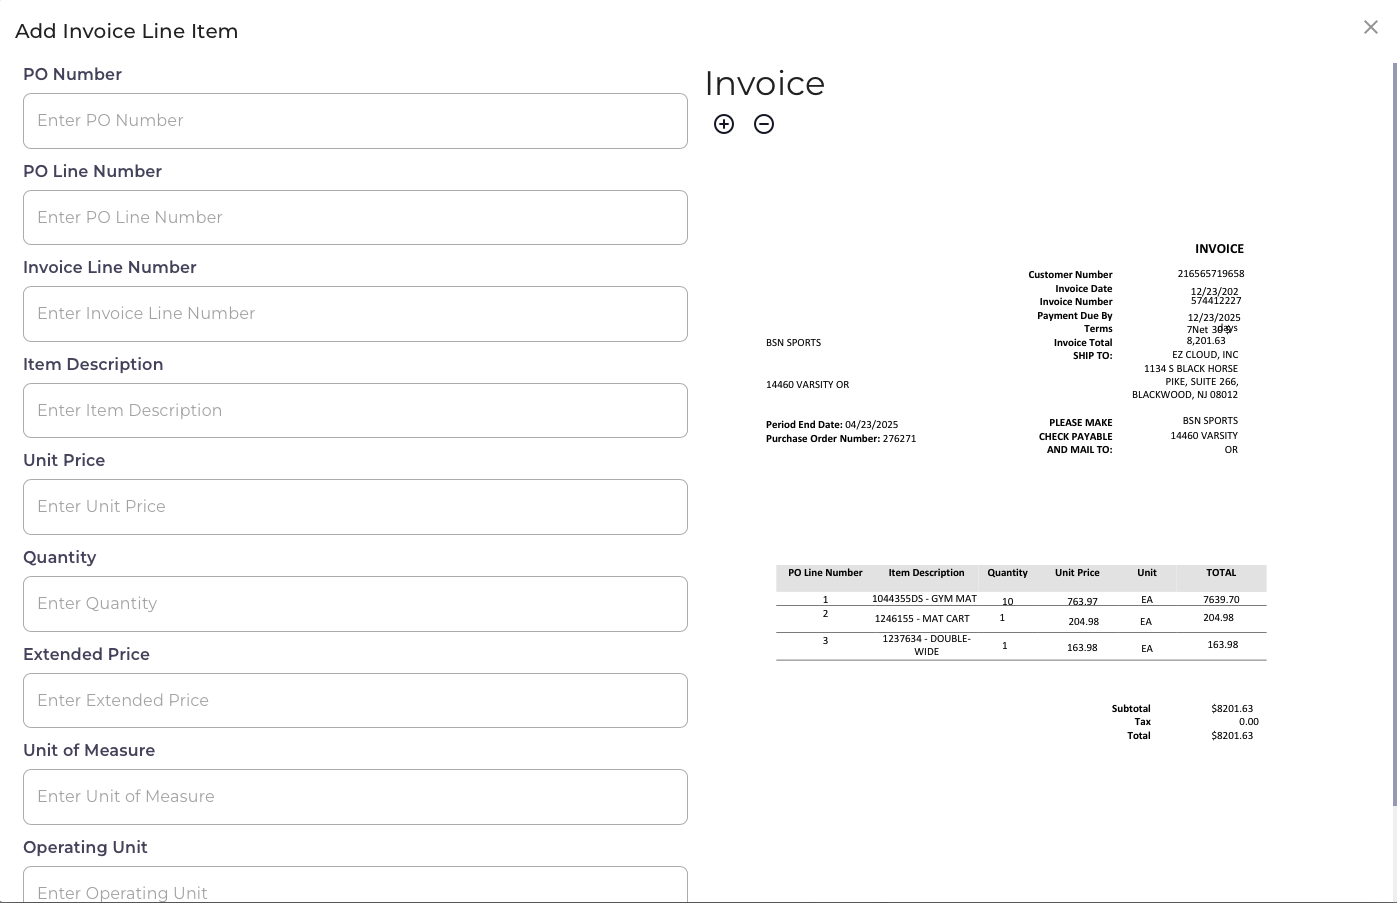
Adding Lines
Click + Add to manually add a line item.
Exception Handling
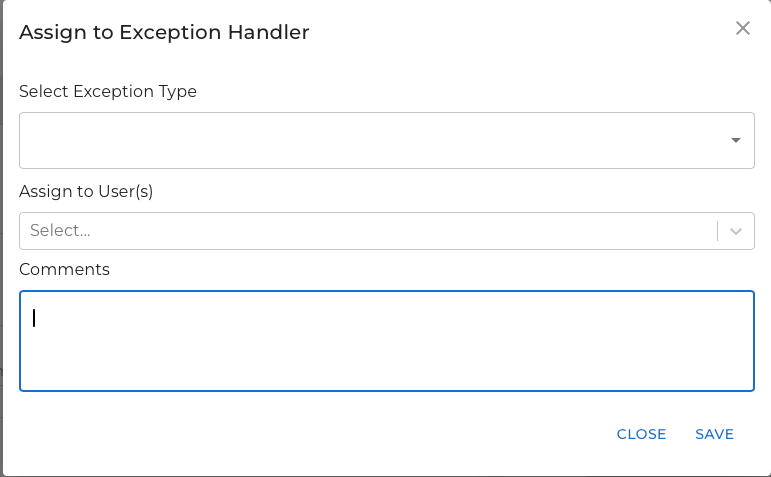
When an invoice requires attention, assign it to an exception handler.
Assigning Exceptions
- Click Assign to Exception Handler
- Select the exception type
- Choose user(s) to assign
- Add comments
- Click Save
Exception Types
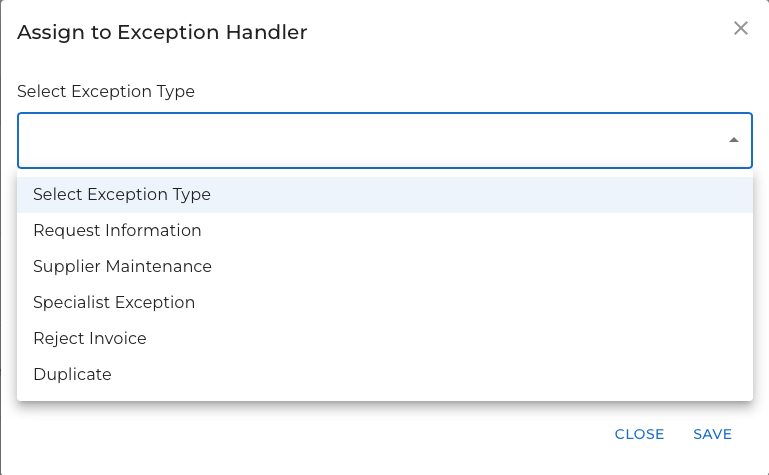
| Type | Use Case |
|---|---|
| Request Information | Need additional details from submitter |
| Supplier Maintenance | Supplier record needs updates |
| Specialist Exception | Requires subject matter expert review |
| Reject Invoice | Invoice should be rejected |
| Duplicate | Invoice appears to be a duplicate |
Working Exceptions
Invoices assigned to exception handlers appear in the Exceptions tab. Handlers can:
- Review the invoice and comments
- Make necessary corrections
- Return the invoice to the approval queue
- Reject the invoice if needed
Collaboration
Chat
The chat panel enables communication about specific invoices.
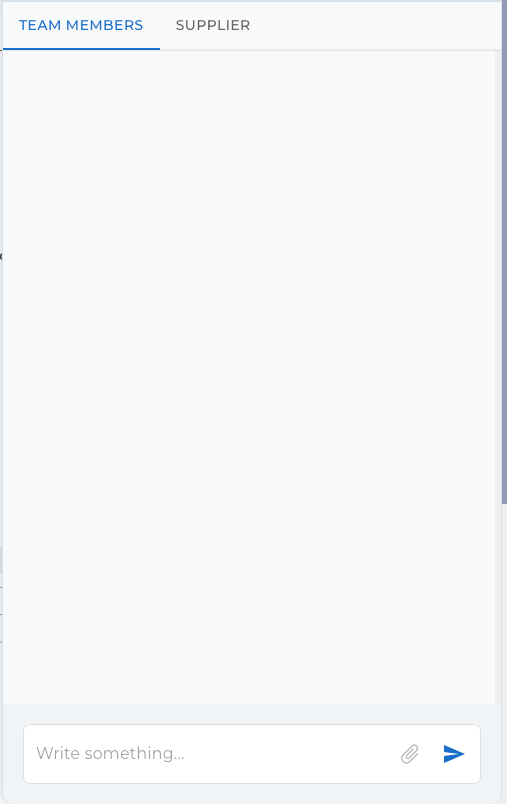
| Tab | Purpose |
|---|---|
| Team Members | Internal discussion with colleagues |
| Supplier | Communication with vendor (if using Supplier Portal) |
Notifications
Receive notifications when:
- Someone tags you in a comment
- An invoice is assigned to you
- Action is required
Notify Approver
Send alerts to the next approver:
- Click Notify Approver
- Select the approver
- Add optional message
- Click Send
Download Options
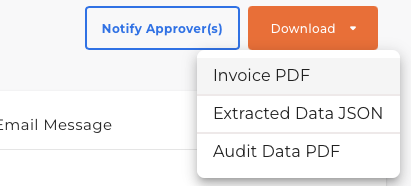
| Option | Description |
|---|---|
| Invoice PDF | Original invoice document |
| Extracted Data JSON | Extracted data in JSON format |
| Audit Data PDF | Complete audit trail |
Re-Upload Invoice
If the wrong document was uploaded:
- Click Re-Upload
- Select the correct PDF
- EZ Cloud re-processes the document
Re-uploading replaces all extracted data. Manual edits will be lost.
Completing Approval
Approve
- Ensure all required fields are complete
- Verify line items match the invoice
- Resolve any validation warnings
- Click Approve
The invoice moves to Approved status.
Reject
- Click Reject or use the Reject Invoice exception type
- Provide a reason for rejection
- The invoice moves to the Rejected tab
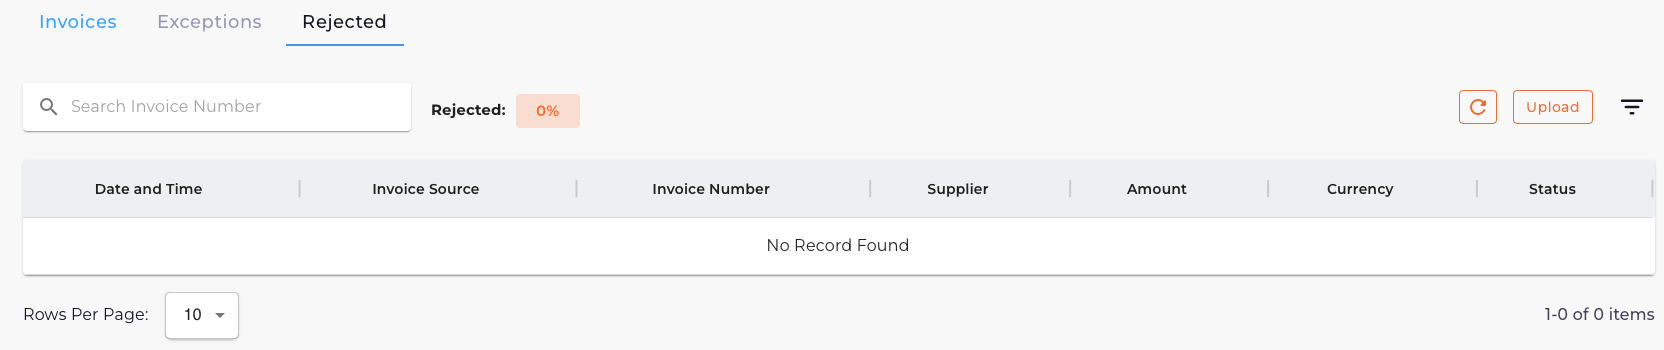
Rejected invoices remain for audit purposes. Suppliers using the Portal can see rejection reasons and submit corrected invoices.
Quick Reference
| Action | How To |
|---|---|
| Edit header field | Click field, enter new value |
| Use extracted KVP | Click dropdown, select value |
| Edit line item | Click row, modify in modal |
| Add line item | Click + Add |
| Assign exception | Click Assign to Exception Handler |
| Send to approver | Click Notify Approver |
| Download invoice | Use download menu |
| Chat with team | Click chat icon |
| Approve | Click Approve |
| Reject | Click Reject |