Quick Start Guide
This guide walks you through the complete invoice lifecycle in EZ Cloud—from the moment an invoice arrives to final approval.
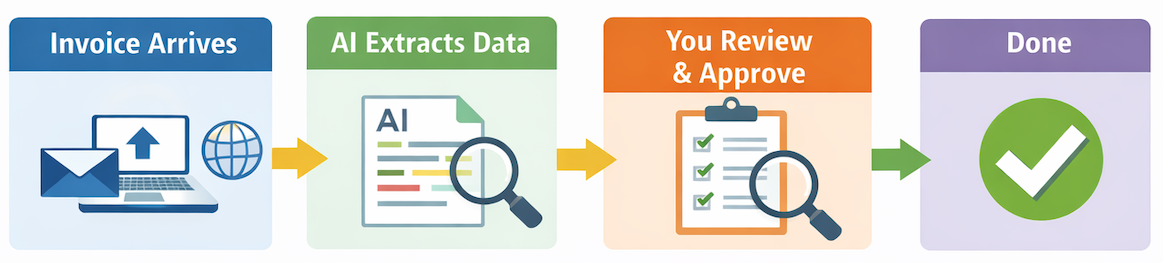
How EZ Cloud Works
EZ Cloud automates your accounts payable process:
| Step | What Happens | Your Role |
|---|---|---|
| 1. Capture | Invoice enters EZ Cloud via email, upload, or supplier portal | Minimal—invoices arrive automatically |
| 2. Extraction | AI reads the invoice and extracts header and line item data | None—this happens automatically |
| 3. Review | You verify extracted data and make corrections if needed | Review and correct as needed |
| 4. Approval | You approve the invoice (or route for additional approval) | Click Approve |
That's it. EZ Cloud handles the tedious data entry so you can focus on review and approval.
Your Daily Workflow
When you log into EZ Cloud, here's what a typical day looks like:
1. Upload Invoices (If Needed)
If you receive invoices directly (mail, email attachments, etc.), upload them:
- Click Invoices then Upload
- Select your PDF file
- Choose which pages are the invoice (not POs or packing slips)
- Click Confirm Selection
The invoice enters the extraction queue. Within moments, it's ready for review.
Use Batch Mode to upload a PDF containing multiple invoices and assign pages to each.
2. Check Your Queue
Navigate to your invoice list to see what needs attention:
- EZ Cloud Essentials: Click Invoices in the navigation
- EZ Cloud Enterprise: Click Inbox to see your workflow queues
Invoices are sorted by status—focus on Pending items first.
2. Open an Invoice
Click any invoice to open the detail view. You'll see:
- The original invoice - The PDF or image on the left
- Extracted data - What the AI found on the right
- Validation status - Automated checks (duplicate, supplier match, etc.)
3. Review the Data
Compare the extracted data to the original invoice:
- Header fields - Invoice number, date, supplier, amounts
- Line items - Descriptions, quantities, prices
Most invoices extract accurately. When something's wrong, click the field and correct it.
4. Take Action
Once the data looks good:
- Approve - Send the invoice forward (to export, payment, or next approver)
- Assign to Exception - Route to a specialist if there's an issue
- Reject - Return to supplier if the invoice is invalid
5. Repeat
Move to the next invoice. With practice, reviewing an invoice takes seconds.
Processing Your First Invoice
Let's walk through an actual invoice step by step.
Step 1: Find an Invoice
- Click Invoices (Essentials) or Inbox (Enterprise)
- Look for invoices with Pending status
- Click one to open it
Step 2: Check the Header
The header contains key invoice information:
| Field | What to Check |
|---|---|
| Supplier | Is this the correct vendor? |
| Invoice Number | Does it match the document? |
| Invoice Date | Is the date correct? |
| Total Amount | Does the total match? |
If anything's wrong, click the field and type the correct value.
See a dropdown arrow next to a field? Click it to choose from other values the AI found on the document. This is faster than typing.
Step 3: Check the Lines
Switch to the Lines tab to review line items:
- Verify descriptions, quantities, and amounts
- Click any row to edit it
- Click + Add if a line is missing
Step 4: Review Validation
Check the validation panel for any warnings:
| Status | Meaning |
|---|---|
| ✅ Green | Passed—no issues |
| ⚠️ Yellow | Review recommended |
| ❌ Red | Problem detected—address before approving |
Common validations:
- Duplicate - Is this invoice already in the system?
- Supplier - Does the supplier match your records?
- PO Match - Does it match a purchase order? (if applicable)
Step 5: Approve
Once everything looks correct:
- Click Approve
- The invoice moves to the next stage (or completes processing)
Congratulations—you've processed your first invoice!
Common Tasks
| I want to... | How to do it |
|---|---|
| Upload an invoice | Invoices → Upload → Select PDF → Confirm pages |
| Upload multiple invoices | Invoices → Upload → Switch to Batch Mode |
| Fix an incorrect field | Click the field, type the correct value |
| Add a missing line item | Lines tab → Click + Add |
| Route to someone else | Click Assign to Exception Handler |
| Ask a colleague about an invoice | Use the Chat panel |
| Download the original PDF | Click Download → Invoice PDF |
| Reject an invoice | Click Reject and enter a reason |
Tips for Success
Let the AI Work for You
- Don't retype everything - Only correct what's wrong
- Use the dropdowns - Select from extracted values instead of typing
- Trust the system - Extraction improves over time for each supplier
Work Efficiently
- Process invoices in order - Oldest first prevents delays
- Use filters - Narrow your list when looking for specific invoices
- Check notifications - Respond to mentions and assignments promptly
When Something's Wrong
- Wrong supplier? - Select the correct one from the dropdown
- Missing data? - Check if it's on the invoice; add manually if needed
- Duplicate warning? - Review the potential duplicate before proceeding
- Not sure? - Use Chat or assign to an exception handler
What's Next?
Now that you understand the basics:
- Your Profile - Set up notifications and preferences
- Invoice Capture - Learn how invoices enter the system
- Invoice Approvals - Deep dive into all approval features
Visit support.ezcloud.ai or email [email protected].