Invoice Approvals
This guide covers the invoice approval workflow for EZ Cloud Enterprise.
If your organization uses EZ Cloud Essentials (standalone), see Invoice Approvals (Essentials).
Accessing Your Inbox
Click Inbox in the main navigation to access your approval tasks.
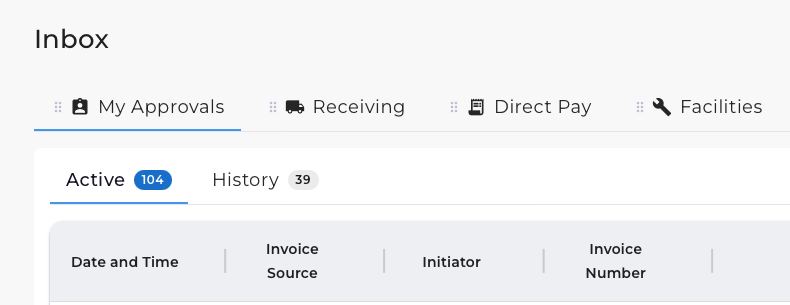
Workflow Tabs
Your configured workflows appear as tabs at the top. Common examples:
- My Approvals - All invoices assigned to you
- Receiving - Invoices requiring receipt verification
- Direct Pay - Non-PO invoices for direct payment
- Facilities - Department-specific workflows
Your workflows are configured during implementation based on your organization's requirements.
Active and History
Within each workflow:
| Tab | Description |
|---|---|
| Active | Invoice tasks currently assigned to you |
| History | Invoices you have previously approved |
Role-Based Queues
If your workflow includes role-based routing, you'll see tabs by approval role:

Examples: Initiator, Budget Manager, PO Approver, AP Specialist. Each shows the count of invoices awaiting action.
Workflow Status
Invoices show their position in the configured workflow:
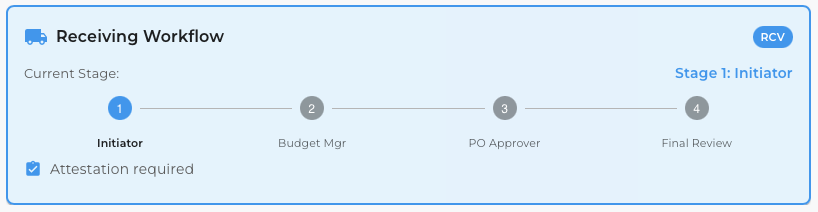
The workflow visualization displays:
- Current Stage - Where the invoice is in the process
- Stage Names - Each approval step (e.g., Initiator → Budget Mgr → PO Approver → Final Review)
- Attestation Required - Indicates if attestation is needed at this stage
Filtering
Click the filter button to open search options:
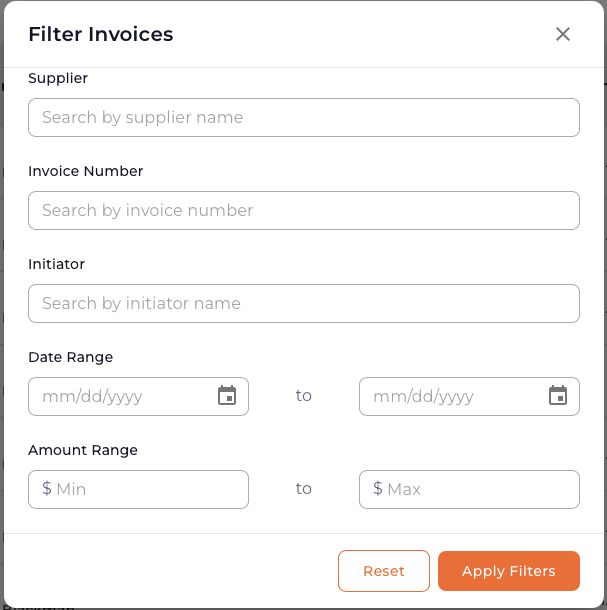
| Filter | Description |
|---|---|
| Supplier | Search by supplier name |
| Invoice Number | Search by invoice number |
| Initiator | Search by who submitted the invoice |
| Date Range | Filter by date range |
| Amount Range | Filter by min/max amount |
Toolbar options:
- Show only my invoices - Filter to your assigned tasks
- Refresh - Sync validations and refresh the list
Invoice Detail View
Click any invoice to open the detail view.
Validation Status
| Validation | Description |
|---|---|
| Duplicate | Checks if invoice already exists |
| PO | Purchase order validation |
| Supplier Data | Validates supplier information |
| Receipt | Three-way match against receipts |
PO vs Non-PO Classification
Invoices are classified as PO or Non-PO:

- PO - Invoice matched to a purchase order
- Non-PO - Direct payment without a PO
This affects available features and validation rules.
Invoice Header
The Invoice Header tab displays extracted data.
Supplier Information
Enterprise benefits from ERP-synced supplier validation:
- Supplier Name - Derived from suppliers synced from your ERP
- Supplier Site - Synced from your ERP system
This ensures invoices match approved vendor records.
Editing Fields
Click Edit to enable editing mode. Make changes and save.
Invoice Lines
Enterprise includes powerful tools for PO-based invoices:
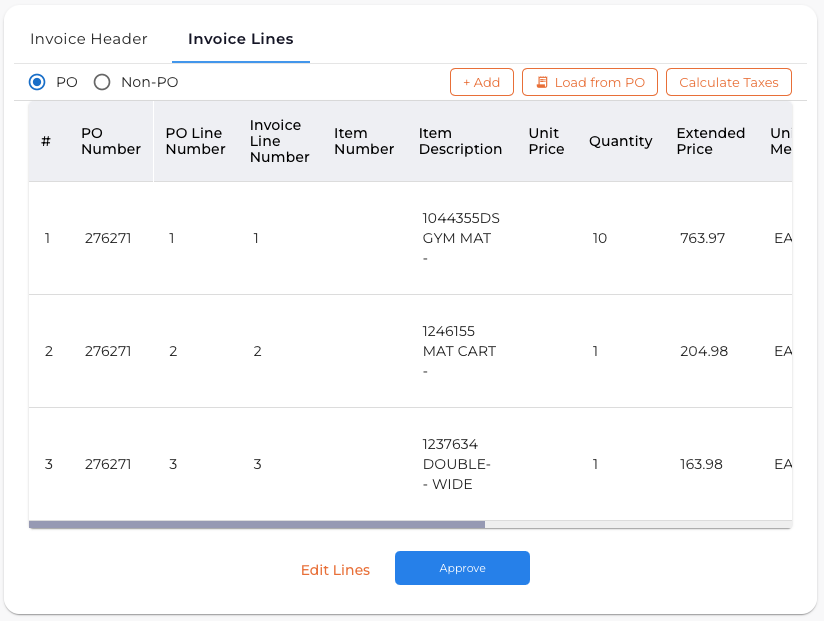
| Button | Function |
|---|---|
| + Add | Manually add a line item |
| Load from PO | Import line data from a purchase order |
| Calculate Taxes | Auto-calculate tax amounts |
Load from PO
Import line items directly from the purchase order:
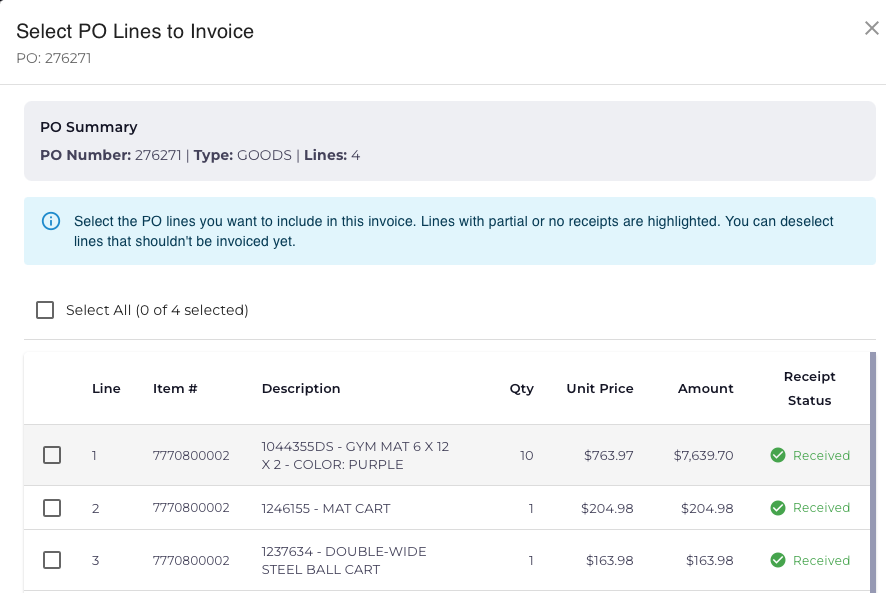
- Click Load from PO
- Review the PO Summary (PO Number, Type, Lines)
- Select the PO lines to include
- Lines show Receipt Status (Received, Partial, Not Received)
- Click to add selected lines
Lines with partial or no receipts are highlighted. Deselect lines that shouldn't be invoiced yet to support three-way match (PO, Receipt, Invoice) validation.
Line Distribution (Splitting)
Split line amounts across multiple GL accounts:
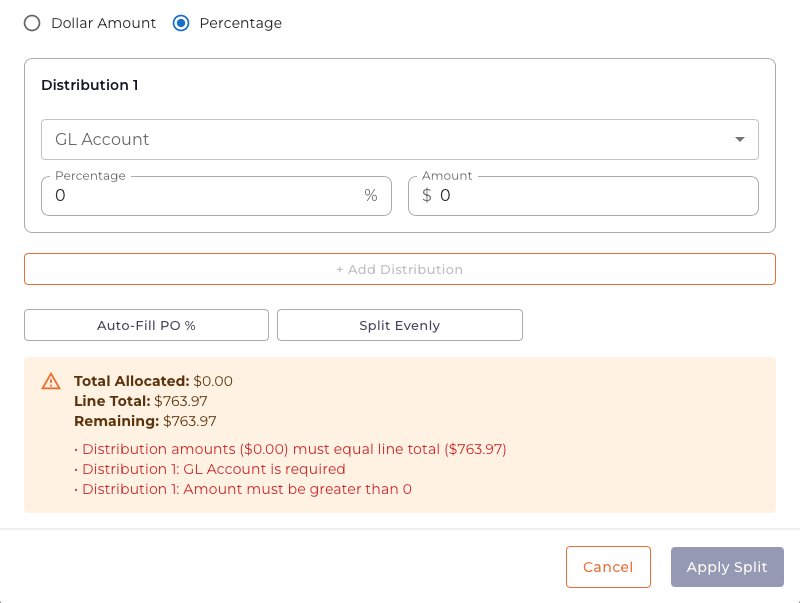
- Click the split icon on a line item
- Choose Dollar Amount or Percentage mode
- Add distributions with GL Account and amount/percentage
- Use Auto-Fill PO % to match PO distribution ratios
- Use Split Evenly to divide equally
- Click Apply Split when allocations equal the line total
Validation ensures:
- Distribution amounts equal line total
- GL Account specified for each distribution
- All amounts greater than zero
Actions
Edit Mode
Click Edit to enable editing of header and line data.
Exception Handling
Click Exceptions to access exception handling. Enterprise may have additional exception types based on workflow configuration.
Resolve Exception: When working an exception, click Resolve Exception to return the invoice to normal workflow after addressing the issue.
Approval Actions

| Button | Action |
|---|---|
| Approve | Approve and advance to the next workflow stage |
| Void | Delete the invoice task from the system |
| Resolve Exception | Return invoice to workflow after handling exception |
Clicking Approve moves the invoice to the next stage in your configured workflow. The invoice continues through all stages until final approval and export to your ERP system.
Collaboration
Chat
Communicate with team members about specific invoices using the chat panel.
Notifications
Receive notifications when:
- Someone tags you in a comment
- An invoice is assigned to you
- Action is required
Download Options
| Option | Description |
|---|---|
| Invoice PDF | Original invoice document |
| Extracted Data JSON | Extracted data in JSON format |
| Audit Data PDF | Complete audit trail |
Quick Reference
| Action | How To |
|---|---|
| Edit invoice | Click Edit button |
| Load PO lines | Click Load from PO |
| Split line to GL accounts | Click split icon on line |
| Calculate taxes | Click Calculate Taxes |
| Handle exception | Click Exceptions |
| Resolve exception | Click Resolve Exception |
| Approve invoice | Click Approve |
| Delete invoice | Click Void |